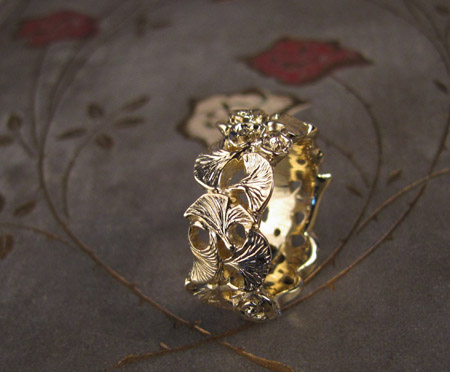
18K gold custom rose and ginkgo ring. This is a recent custom order I finished for a woman in Japan.
First I sketched a potential design. Once this was okayed, I could start in with the wax carving.
To start with, I hacked off a slice of carving wax the width of the proposed ring. I bored out the inside to the proper ring size, filed the sides parallel, and filed down the top to an even thickness. This step used to take me a ridiculously long time but now I’m pretty good at it and can brute out a general ring shape in no time. I typically carve a thick ring; rings feel better to me when there is some substance to them. I start with 2.5mm thickness generally and whittle down from there. The final ring will usually be around 2.25 thickness.
I measured out my three rose groupings so they would be even and balanced. Then I started to sketch out my design by scratching it onto the wax with a dental tool. I often have to adjust my design once actually laid out onto the wax since it always fits differently than it does on a piece of notebook paper.
Here I’ve bored out the holes between the ginkgo leaves and cut away excess wax. I use a regular twist drill and exacto knife to do this.
Neatening the openwork and starting to shape a little. Once I get the shape right, I start carving contour with a dental tool. I have a number of dental tools but I really only use one, which I’m absurdly dependent upon. I got it from my dentist years ago and sharpened a new, pointier point onto it. I broke one end of it off a few years back and I’ll be severely irritated if I ever break off the remaining end, which has thee perfect angled tip and the perfect amount of springiness and flexibility.
Here I’ve roughed out the shape on the leaves and started to form the roses. I’m going for a lot of movement on this ring, high relief.
The wax carving is almost complete. I go over and over the piece to neaten up edges, clean up my scratch marks, and make sure the continuity is nice between the outside carving to the smooth inside edge of the band. I often use 1200-grit sandpaper in this step, which is pretty much crazy time, but I always thank myself later when I don’t have to sand irritating scratches out of metal.
Once I’m finished with the basic carving, I do the finishing texture and details. Here I’ve done a bit more work on the rose petals and added the ginkgo leaf texture. The wax model is complete.
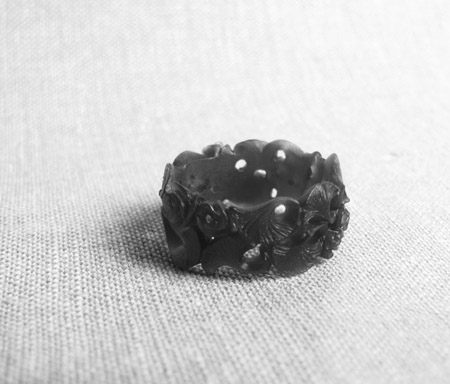
The glamour shots. Sometimes it’s hard to imagine the ring when it is purple wax… I’ve been experimenting with removing the color, etc. I can’t decide if it really helps though.
I’m still working on getting the lighting just right in the new studio. I took the finished gold photo before I got my diffuser working right. Unfortunately, it’s the only one that really worked and I didn’t get any others of different angles of the ring, showing more of the roses. Oh well.
EDITED: You can see a photo spread of Pheigi & Kiichiro’s amazing Scottish/Japanese/Steampunk style wedding here.


Holey moley I love your carved rings!! Someday I’ll buy one for myself.
Incredible work of art! Glorious combination roses and Gingko!
Wow this is really cool, I get to see the whole process! I love my ring to bits! It is exactly what I wanted and fits perfectly. I didn’t realise you didn’t get to take more photos of it all finished so I will take some for you and send them over.
Thankyou soooo much again.
Love Pheigi
Hi there Pheigi! I’m so glad to hear you love it 🙂 I’d love to see some photos. I didn’t have my photo set-up working too well because I had just moved, didn’t have all my light diffusers, (etc. blahblah) so none of the photos really turned out too well.. I’d love a pic 🙂