Category Archives: Process

Process behind creating a piece.

work in progress: emerald pear solitaire

Wax carving: Emerald pear cabochon solitaire

This is a one-of-a-kind wax carving I made for this cool emerald cabochon. I’ve been thinking about this stone for about two years now (I believe I bought it three gem shows ago now). It would be perfect in 18K yellow gold (because everything is perfect in 18K yellow gold…).

Wax carving: Emerald pear cabochon solitaire

IF this might be something you might like for yourself, and if I haven’t cast it yet (I haven’t as of this posting date), send me an email and I’ll get you a quote: cheyenneweil@gmail.com. If you would like it for yourself, I’ll adjust it to your size before casting too.

Continue reading

photo shoot!!

https://vimeo.com/260884774

I was invited to participate in a photoshoot! I’ve never done one before, so all the action was super interesting for me. The videos were shot & assembled by Glitch Films.

The behind-the-scenes video is also really cool:

https://vimeo.com/260884597

I’m even in it! I feel he captured my natural flailiness quite well.

More after the click: Continue reading

stones for custom pieces!

red-pink-orange rose-cut diamonds

I have, over the years, accumulated a handful of stones that would love to find a home in some sort of custom awesomeness. The above trio are some sweet red and orange translucent rose-cut diamonds. (More details & photos of these below.)

Ethiopian opal in snake ring

I could not pass this flashy Ethiopian opal up when it called out to me from the sidelines of the Tucson gem show. I think it would work nicely in my snake cocktail ring, or perhaps you have another idea?

MORE more more after the click: Continue reading

pavé class

faberge poppy ring

[Poppy ring by Faberge (modern). Multi-colored diamonds, padparadscha sapphire, blingy-bling, platinum, gold, etc.]

I left for my pavé setting class (at Revere Academy in San Francisco) with all sorts of grand ideas about what I would make the moment I got home. I even sketched designs on the flight over. Of course, after one day of class, it was sharply clear that I will need to practice for MANY hours before I will be even near confident enough to offer pavé set stones in my pieces. Pavé is hard! I can’t believe it!

But it is also kind of fun. In a super-neurotic hyper-detail-oriented sort of way, which is my specialty. I acquired a bunch new tools, including lots of pokey sharp gravers, and one of those opti-visors so now I can look like a grouchy old man when I set my stones. It was a long time coming and I have to face the facts: my eyes are not spring chickens anymore. My husband has been telling me this for years.

[Another modern Faberge design. Doesn’t it look like FUN to set all those little diamonds? I’m assuming this is a ring and that it was made by a hoard of nimble-fingered fairies.]

This was also my first real introduction to engraving using actual engraving tools (I had previously only done sort of half-assed engraving using scavenged tools modified for the job and, you know, it’s just not the same). I was surprised to discover I really like engraving. Engraving = carving metal, essentially, and so I suppose it should not have come as a surprise. Unfortunately, it’s WAY harder than carving wax so my engraved attempts were totally wonky and my lines wobbly and gougey and too deep/thick/everythingelse. But with some practice, I think I’ll be able to add engraved design elements into my pieces. Hopefully engraved designs paved with wee sparkling diamonds. Yay!

[Massive crazy ruby-encrusted ring (also modern Faberge). I’m generally not a huge ruby fan but, you know, I’d totally wear this.]

lalique dog collar - reed players

lalique dog collar pansy

[Rene Lalique: top is the centerpiece for a pearl “dog collar” style choker with molded glass reed players and diamond folliage. The bottom is an enameled pansy choker centerpiece with pavé diamond accents.]

I can’t even imagine how long it took to set all the stones in some of these pieces. I used to think this sort of thing was gaudy but I have since amended my blasphemous ways. I am especially fond pavé-set stones of varying color and size, and the way Lalique uses pavé in his designs is my absolute favorite. This is pretty much what I set out to do when I started making jewelry: make stuff as cool as Lalique.

And lastly, because this is after all Portland, OR (where we love everything cephalopod), I present to you the diamond encrusted octopus:

pave diamond octopus

(Squids, shocking though it may seem, are grossly underrepresented in the diamond jewelry world. I hurt.)

multi-stone cuff bracelet

lapis, turquoise, diamond, ss cuff bracelet

These stones started as a few rather, ahem, “dated” rings and pendants. The lapis was an individual stone that had been in the family for a long time. I picked all the stones out, recycled the metal, and we tossed around ideas for a bracelet, then a pendant, then a ring, then finally just decided “use up all those random stones and make one big SOMETHING!” So, here’s my something: a cuff bracelet with etched and engraved floral motif set with lapis (from Afghanistan), Persian turquoise, and a smattering of diamonds ranging in size from 3.5mm diameter to 1.6mm.

lapis, turquoise, diamond, ss cuff bracelet

lapis, turquoise, diamond, ss cuff bracelet

As usual, I stressed unduly over my design since it had been about a zillion years since I had etched anything (did I still even have the stuff?) and also my engraving skills revolve around guesswork since I’ve never been formally trained in any of this. I relied on the etching of course for the main design and then neatened it up where I needed to with the engraver. I should do more engraving—it’s kind of fun!

sketch for bracelet

Here’s my sketched design. Originally, I had planned to make the bracelet straight-sided but during the process of soldering on the largest bezel (each bezel had to be carved on the bottom to fit the contour of the bracelet exactly so they could be soldered down), I got a little close to the edge with the pointy end of my torch and melted it all up. I totally freaked out, paced about a bit, took some deep breaths and surveyed my screw-up. I hammered it back as smooth as I could but couldn’t really get the metal to smoosh back out to form a nice clean edge like before. But then it occurred to me that I kind of liked the way the edge swooped in; I added more swoops and I think it improved the overall look and design. I re-engraved the part of the design I had obliterated with my torch and hammering and in the end, it is all but invisible unless you know where to look. I felt very lucky and the rest of the bezels, including all diamond bezels, went on with no trouble at all.

lapis, turquoise, diamond, ss cuff bracelet

lapis, turquoise, diamond, ss cuff bracelet

I put a deep french-gray patina in the design grooves and around the edges of bezels to give it more depth and polished the rest of the bracelet to a bright satin finish.

how I price my work

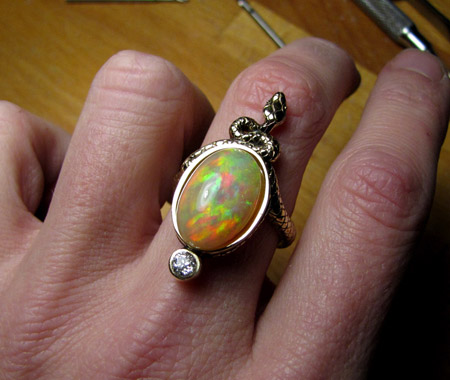
I’ve been doing a major overhaul of my pricing scheme this past week or so here at Gin & Butterflies headquarters (ha! “Headquarters”—makes me sound like a secret agent or something). It’s been long in the coming but basically, about two weeks ago I idly looked up the gold market price and about died because holy shit if it wasn’t upwards of $1320/ounce*. Which is SO not cool. I have to raise my prices.

My pricing scheme thus far was based on some sort of a weight/gold content/time carving/finishing scheme that I devised like a million years ago and have been estimating and adding on to ever since. At this point, pricing had become essentially arbitrary. Every time I had to come up with a price for a new piece, I sort of eyeballed it with what I hoped was a studious expression (actually, it was mostly just squinty; never check one’s studious expression in the mirror), hefted it against one of my “known” weighted pieces, measured the width and tried to remember how many hours I had spent carving it, pulled a number out of my ass and called it done. Then I realized I forgot to add in the diamonds. Then I had to go get a calculator because I forgot how much I paid for said diamonds. This is why it’s always like 10pm by the time I manage to get something listed on Etsy and I’m needing another bourbon.

In fact, I’m ready for another bourbon now.

Then, I read this post by another Etsy blogger and decided I really needed to get my act together. Come up with a cohesive and sensical pricing formula that is fair and actually compensates me for the immense amount of time I spend creating these rings (radical idea, I know).

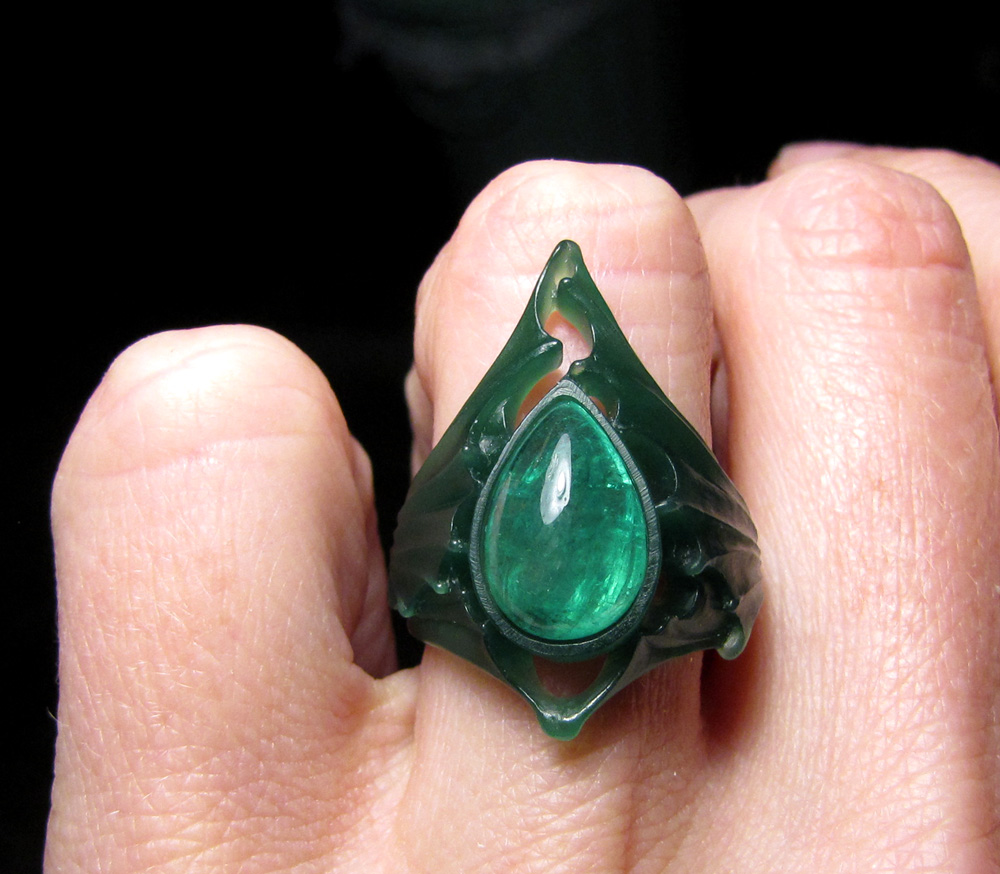
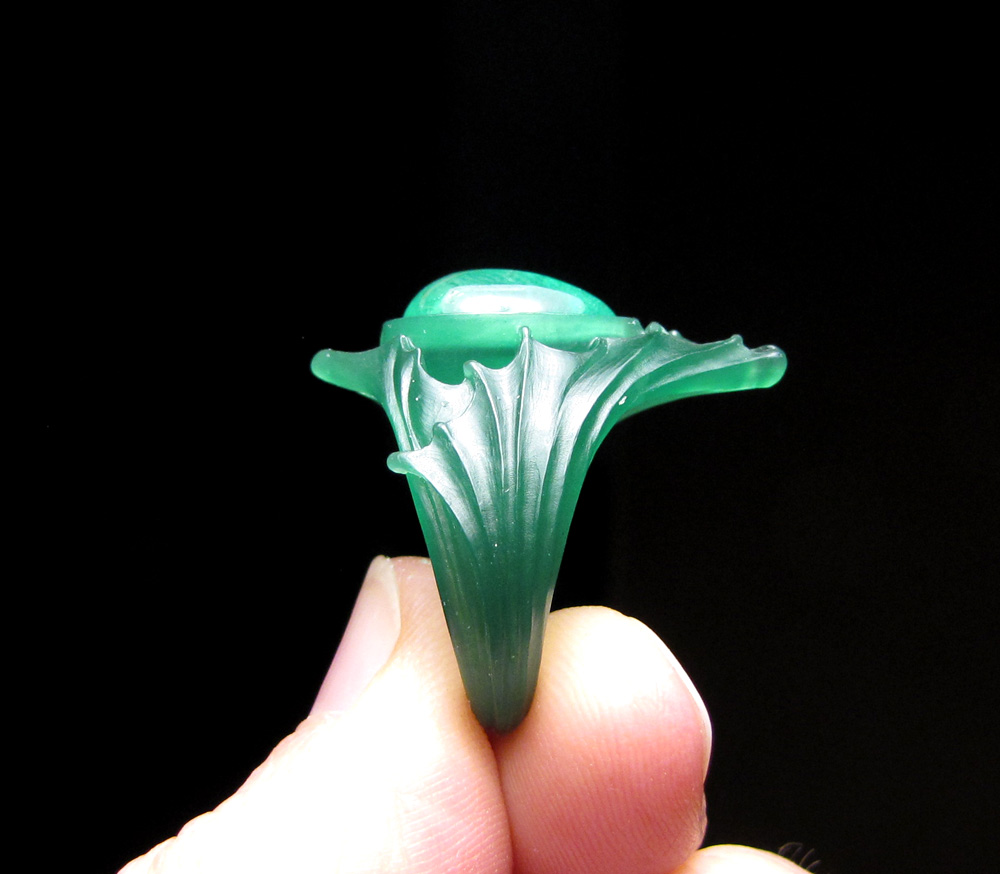
I brought all my pieces to the studio, weighed them (most are 18K gold), figured out the formula to get weights in 14K, worked out how much I paid for 18K and 14K alloys exactly (hint: significantly more than simply 75% and 58% gold market, respectively), worked up this incredibly vague figure that tried to encompass tool wear, polishing compounds, acids & chemicals, torch fuel, wax, sandpaper, gingersnaps, polishing and grinding compounds, packaging materials, studio rent, bandaids, etc. Then I incorporated a “Pain in the Ass” factor, which is to say that though I love each and every piece I make dearly, I have to admit that some of them are a whole lot fatter of a hassle to make than others (I’m looking at you, Art Nouveau Band). Those rings with all those little holes in the carvings? I have to thread grit-impregnated strings through all those holes and saw it back and forth to sand/polish smooth. Then I do it again with finer grit/polish. I like to think it is a meditative process.

So yeah. All that plus the fact that each piece I designed, sketched, and carved from scratch. Some of the carvings took me a really long time to do originally.

In addition to all the touchy-feely stuff, there are Etsy fees, Paypal fees, shipping fees, blahblahdeblah. I whined a bit at how coooommplicated it was all getting but then Joshua introduced me to the wonders of the modern spreadsheet. Which was SO COOL because you can like make all these formulas and stuff to calculate each cell based upon what is in other ce.. You already know this, don’t you. Anyway, to make a long story short, once I figured out what I was doing I was able to build a very complicated spreadsheet of every single piece I’ve ever made that spit out a very precise cost in like 13 minutes.

I updated my Etsy prices accordingly. Surprisingly, I would say that I came really close. Some things were way underpriced (FIXED! ahem!) and others were a bit over, but for the most part, I was within usually $50 of where I needed to be (for now: see * below).

My formula is still not perfect and is missing bits and will need to be further tweaked. Plus there are things I feel like you just can’t adequately (or fairly) charge for. I spend an amazing amount of time answering convos and emails to people who are interested in a custom piece; 2/3 of these I would say that after 2-10 rounds of question/answer, I never hear from again. The process of making a custom piece for someone can become very complicated, requiring much back-and-forthing of emails, photos, sketches, weighty decision-making, etc. Then there is the design time. Some designs sort of flow out very freely but others I grapple heavily with, stress about, and stay up late procrastinating over. I don’t mind it—and I feel like it is good exercise actually, but it does take a bit out of me.

How can you possibly charge for these things? It’s easy enough to figure out how much gold is in a piece, but all that other stuff? And I haven’t even broached the subject of research and design sophistication. Do I charge more for what may technically be a better design? Maybe when I’m rich and famous I can but I only have a handful of designs. Well, a couple of handfuls.

I think Rosy puts it well: We have to love what we do or else we would explode in a flaming ball of frustration, handily taking out your average city block (I paraphrase..). I’ll say it this way: I DON’T sit at a desk fidgeting in my business casual while tweaking someone else’s Powerpoint presentations for a living; I make my own jewelry! Out of gold and diamonds! And more amazingly: people want it!! It’s really gratifying and exciting, and it makes me very happy.

Anyway hopefully this was worth reading because it was way longer than I though it would be. Yeesh. Just be happy I don’t price in the amount of time it takes me to figure out how much I should charge for my work..

* Okay so today it’s at $1350/ounce. CUT IT OUT YOU CRAZY RICH GOLD-BAR-BUYING HOARDERS!! I HATE YOU!

jacquelyn’s pearl

Gold South Sea pearl, diamond, 18K gold ring

You have no idea how much I stressed over drilling out this big beautiful golden pearl.

Jacquelyn contacted me with this pearl conundrum: she had a pearl that came from a necklace (so it was drilled all the way through) but wanted it for a ring. So… could I maybe set a stone or do something not weird with the hole in the top? Being me, I’m all “We should put a diamond in that hole.” So I got to work. I made the wax, adjusted it to size, got it cast, finished it out, set the diamond in the tubing, shaped and prepped the tubing to be set in the pearl, prepped the mounting for the pearl… and then I stopped and sweat for like a week.

I was terribly paranoid about chipping the surface of the pearl when I drilled it out for the diamond stud. I drill pearls all the time and I use special pearl drilling bits, but they are only small holes, like 1/2 millimeter in diameter. This was to be a 2.5mm diameter hole and as far as I know, they don’t make special pearl drill bits this size. Regular twist drills don’t work; they trash the nacre and chip it all to hell. I have tried. One could suggest that I had two chances to set the pearl: once on one side and if that didn’t work, then I could set the failed end down and have a fresh chance. Naturally, that idea sucked because I just couldn’t give back a pearl all wanged up even if the wanged-up part was set down into the ring and invisible. Also, the pearl had a couple of little dits on one end; this end needed to be set down in the ring mounting. So basically I had one chance. GAH!

I decided to treat the pearl like it was a normal setting job and used the tools I use to set diamonds. Bud burr, setting burrs, etc. The trick seemed to be that I had to drill the pearl at an extreme angle to keep it from chipping (I know this because I trashed two other practice pearls figuring it all out). Then once the nacre is opened up, you can drill straight down. It took a steady hand and a lot of patience but when I finally got my nerves together to do the real thing, it worked flawlessly.

I was never so happy to put that ring in the box and tie a little ribbon around it and send it off. Would I do it again? ABSOLUTELY! My god just look at how awesome it is:

Gold South Sea pearl, diamond, 18K gold ring

Gold South Sea pearl, diamond, 18K gold ring

Like a jeweled gooseberry. With a big sparkley bead of dew on it. YUM.

caty and justin’s rings

I got a recent commission for a matching pair of wedding bands with perhaps a fish theme (the owners had a sweet story about a minnow). I did a couple of sketches of minnows wrapped around a band. Then it came up that the peacock feather was the design theme of their wedding. Maybe we could work that into the ring…

A fish and a feather. Ooh!

[I may not know how to spell “lacy” but I do know my feather anatomy!]

I really had a fun time carving these rings. A while back I sketched a design for a big ol’ peacock ring (peacocktail ring?) but never got around to actually carving it. Maybe I’ll dig it back out now because I love how the feather motif worked on the ring.

I start out evenly: cut waxes, cut out basic shape with file, scratch in design with something scratchy… Then I go to town. I try to keep continuity by carving on both rings, not getting ahead too far on one or the other, but inevitably at some point I lose myself and focus on one ring until I’m essentially finished.

As usual, I carved the first ring (hers) and looked at my rough scratches on the second ring (his) and said to myself: “Oh bother; how can I make this one as good as the first?” This happens every time. And every time the same thing happens.

I carve the second ring… and I like it even better than the first.

Then I feel bad for the first ring.

But after a short time my feelings equalize and I really find in the end that I don’t know which one turned out “best.”

Because they both turned out perfectly.

pheigi’s ring (wax carving process)

18K gold hand-carved rose and ginkgo leaf ring

18K gold custom rose and ginkgo ring. This is a recent custom order I finished for a woman in Japan.

First I sketched a potential design. Once this was okayed, I could start in with the wax carving.

To start with, I hacked off a slice of carving wax the width of the proposed ring. I bored out the inside to the proper ring size, filed the sides parallel, and filed down the top to an even thickness. This step used to take me a ridiculously long time but now I’m pretty good at it and can brute out a general ring shape in no time. I typically carve a thick ring; rings feel better to me when there is some substance to them. I start with 2.5mm thickness generally and whittle down from there. The final ring will usually be around 2.25 thickness.

I measured out my three rose groupings so they would be even and balanced. Then I started to sketch out my design by scratching it onto the wax with a dental tool. I often have to adjust my design once actually laid out onto the wax since it always fits differently than it does on a piece of notebook paper.

Here I’ve bored out the holes between the ginkgo leaves and cut away excess wax. I use a regular twist drill and exacto knife to do this.

Neatening the openwork and starting to shape a little. Once I get the shape right, I start carving contour with a dental tool. I have a number of dental tools but I really only use one, which I’m absurdly dependent upon. I got it from my dentist years ago and sharpened a new, pointier point onto it. I broke one end of it off a few years back and I’ll be severely irritated if I ever break off the remaining end, which has thee perfect angled tip and the perfect amount of springiness and flexibility.

Here I’ve roughed out the shape on the leaves and started to form the roses. I’m going for a lot of movement on this ring, high relief.

The wax carving is almost complete. I go over and over the piece to neaten up edges, clean up my scratch marks, and make sure the continuity is nice between the outside carving to the smooth inside edge of the band. I often use 1200-grit sandpaper in this step, which is pretty much crazy time, but I always thank myself later when I don’t have to sand irritating scratches out of metal.

Once I’m finished with the basic carving, I do the finishing texture and details. Here I’ve done a bit more work on the rose petals and added the ginkgo leaf texture. The wax model is complete.

final wax for 18K ginkgo and rose ring

The glamour shots. Sometimes it’s hard to imagine the ring when it is purple wax… I’ve been experimenting with removing the color, etc. I can’t decide if it really helps though.

final wax for 18K ginkgo and rose ring

I’m still working on getting the lighting just right in the new studio. I took the finished gold photo before I got my diffuser working right. Unfortunately, it’s the only one that really worked and I didn’t get any others of different angles of the ring, showing more of the roses. Oh well.

18K gold hand-carved rose and ginkgo leaf ring

EDITED: You can see a photo spread of Pheigi & Kiichiro’s amazing Scottish/Japanese/Steampunk style wedding here.